> For the complete documentation index, see [llms.txt](https://doc.telosys.org/llms.txt). Markdown versions of documentation pages are available by appending `.md` to page URLs; this page is available as [Markdown](https://doc.telosys.org/telosys-with-jetbrains-ide.md).
# Telosys with JetBrains IDE
For seamless integration of **Telosys** with a **JetBrains IDE** (IntelliJ, PyCharm, GoLand, PhpStorm, etc.), the simplest approach is to launch the telosys command in the IDE's integrated **terminal** and install the **plugin** that provides syntax highlighting for .entity files.
### 1 – Launching Telosys in the Terminal
**Prerequisite**: \
The **`telosys`** command must be accessible via the **`PATH`** (an environment variable of the shell you are using; see "Telosys installation" for details).
**Steps**:
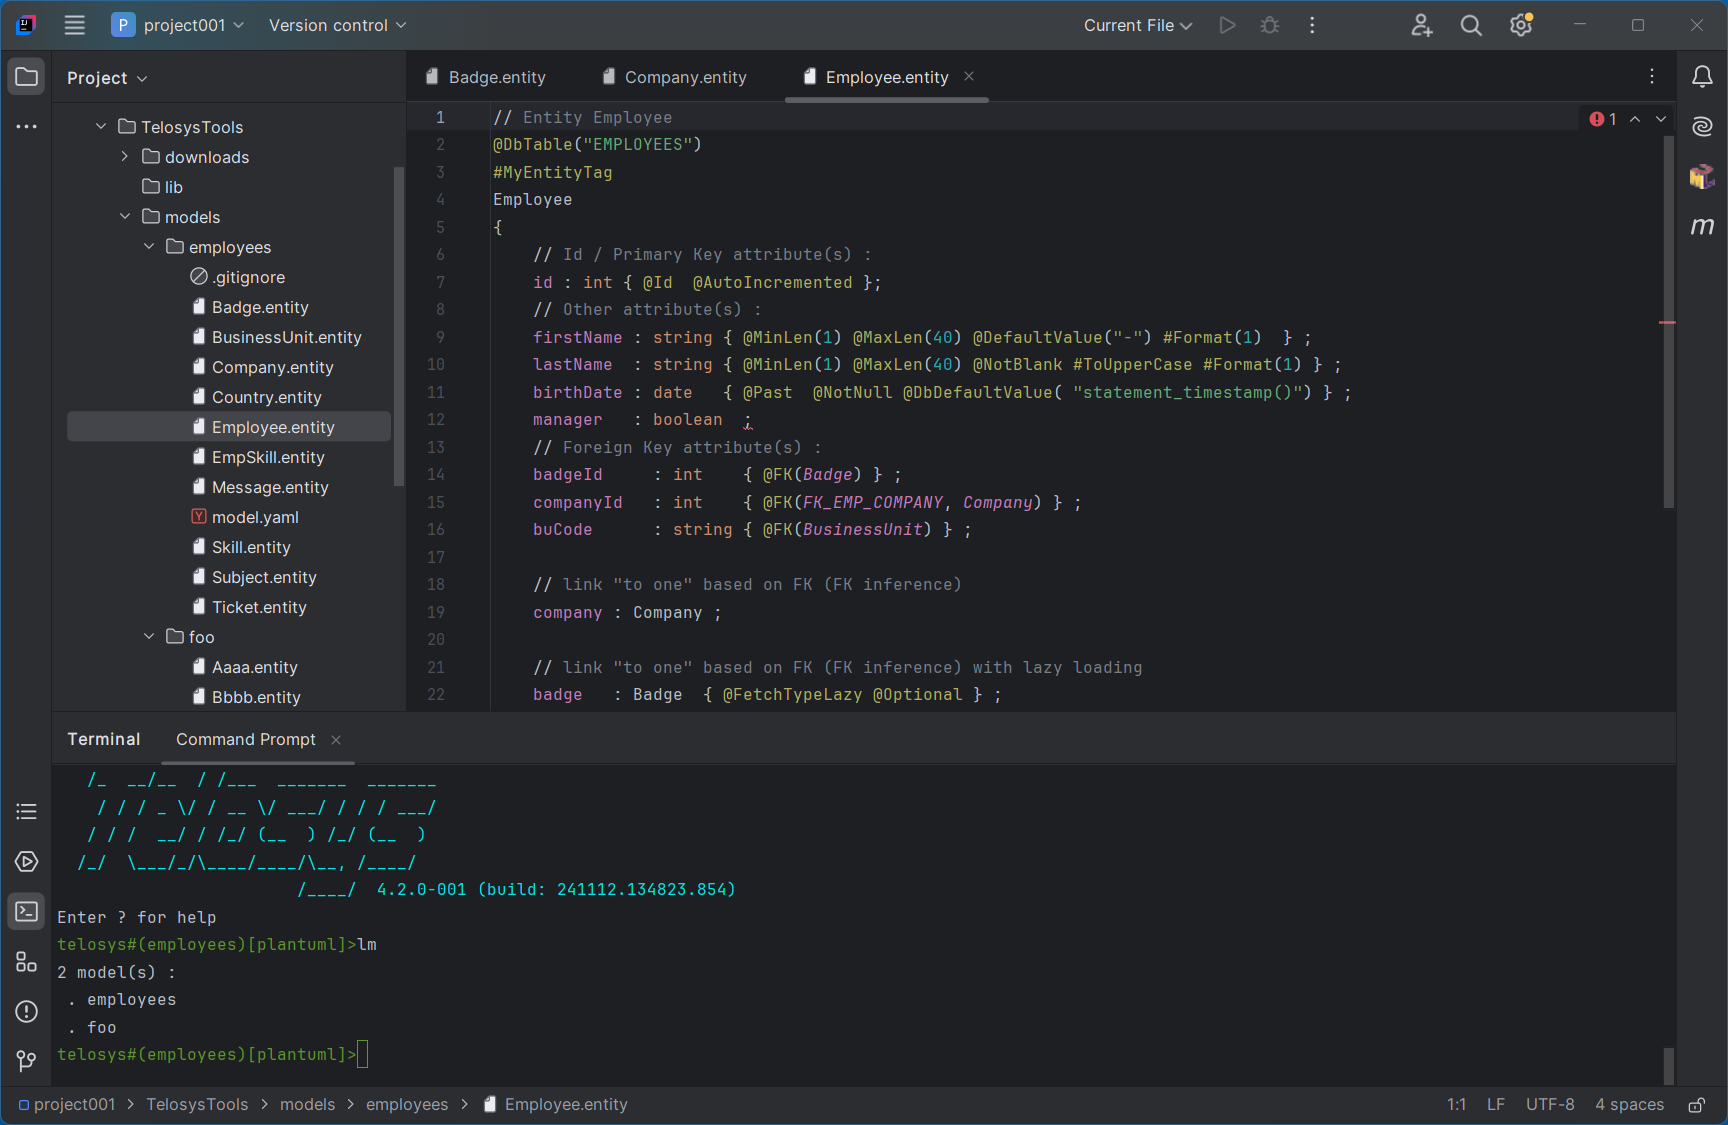
* Open a new tab in the IDE's terminal with the shell of your choice (by default, the current directory is the root of the active project).
* Launch Telosys from this shell: \
Command: **`telosys`** (or **`tt`** for older versions). \
Telosys starts in the current directory.
* Set the Telosys "home" directory with the command **`h .`**
**Note**: \
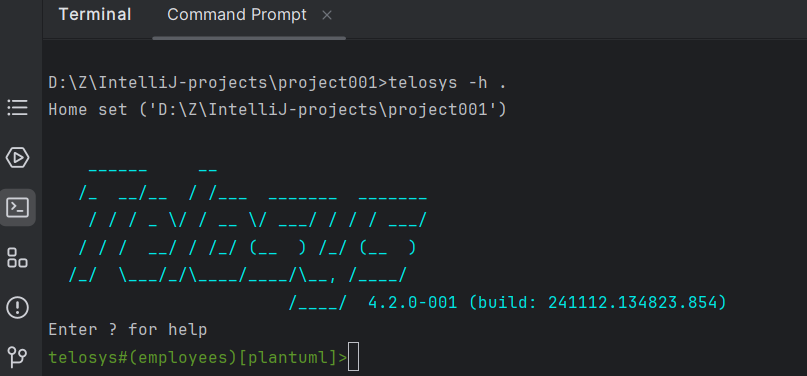
You can also launch Telosys with the -h . parameter so that the "home" directory is set immediately.\
Command: **`telosys -h .`**
### 2 - Terminal customization
You can also use the IDE settings to define Telosys as the terminal shell.
**Steps**:
* Open the "**Settings**" (Ctrl + Alt + S)
* Go to "**Tools / Terminal**"
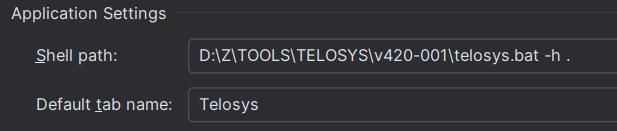
* Define Telosys as the default shell :
* Shell path: **`aaa/bbb/ccc/telosys.bat -h .`**\
(telosys command full path, with ".bat" extension on Windows)
* Default tab name: **`Telosys`**
Example:
By doing so, Telosys will be launched by default every time a new tab is opened in the terminal ( for example by clicking on “**`+`**” or with "**`Ctrl+Shift+T`**" )
### 3 - Plugin installation
See:
### 4 - Tips and tricks for IDE
#### Spelling
If you have the word "Telosys" in the generated code (in comments for examples) \
the IDE will consider it as a "typo". \
To avoid that you just have to add it in the IDE dictionary:
* In the menu: **Settings** / **Preferences** : search "*spelling*"
* Select the dictionary:
* Application-level = for all projects you open in this IDE
* Project-level = only the current project
* ⇒ Select **application-level**
* Add the new word \[+] in "**Accepted words**"